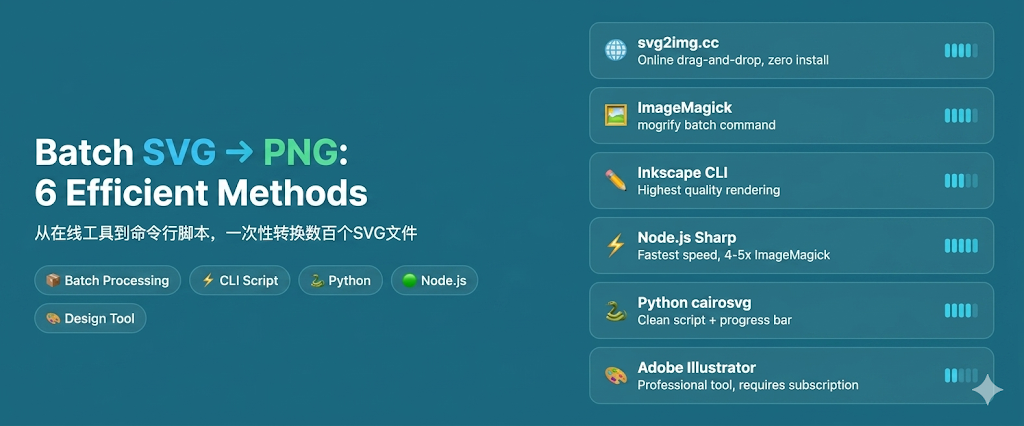
Batch Convert SVG to PNG: 6 Efficient Methods for Bulk Processing
From icon sets to design systems — 6 methods to batch convert SVG to PNG. Covers online tools, CLI scripts, Node.js and Python automation.
On this page
You've got a whole folder of SVG icons that need to become PNGs — maybe an icon set from a design system, assets downloaded from a stock site, or resources migrated from an old project. Converting them one by one? That's not going to work.
This guide covers 6 methods for batch SVG-to-PNG conversion, from zero-installation online tools to fully automated command-line scripts, suitable for every skill level.
Why Batch Conversion Matters
Batch SVG-to-PNG scenarios are more common than you'd think:
- Icon set management: Icons exported from Figma/Sketch are SVG, but apps often need PNG
- Design system delivery: Designers hand off SVG source files; developers need multi-size PNGs for different devices
- Asset bulk processing: SVGs from Flaticon, IconFinder, etc. need unified conversion
- Legacy migration: Moving from SVG to bitmap-required platforms (email templates, PPT, certain CMS)
- Multi-resolution output: One SVG needs @1x, @2x, @3x PNGs
Method 1: svg2img.cc (Online Batch Conversion)
svg2img.cc supports dragging in multiple SVG files simultaneously. All processing happens locally in your browser — no uploads to any server.
Steps
- Open the svg2img.cc Batch SVG to PNG Tool (supports up to 10 files at once)
- Drag and drop multiple SVG files into the page at once (or click to select multiple files)
- Set the output format (PNG) and dimensions
- Click batch convert
- Download results individually or as a batch
Advantages
- Zero installation: Open your browser and go
- Privacy-first: Files never leave your device
- Uniform settings: Configure once, apply to all files
- Non-technical friendly: No command-line knowledge needed
Limitations
- Best suited for dozens to a few hundred files
- For 1000+ files, consider command-line solutions
Method 2: ImageMagick CLI (mogrify for Batch)
ImageMagick's mogrify command is specifically designed for batch image processing.
Basic Batch Conversion
# Convert all SVGs in current directory to PNG (transparent background)
mogrify -background none -format png *.svg
Batch Conversion with Parameters
# Specify DPI and dimensions
mogrify -background none -density 300 -resize 512x512 -format png *.svg

# Recursive directory processing
find . -name "*.svg" -exec mogrify -background none -format png {} \;
Multi-Size Batch Output
#!/bin/bash
# Generate @1x, @2x, @3x for each SVG
for svg in *.svg; do
  name="${svg%.svg}"
  convert -background none -density 150 "$svg" "${name}@1x.png"
  convert -background none -density 300 "$svg" "${name}@2x.png"
  convert -background none -density 450 "$svg" "${name}@3x.png"
done
Important Notes
-background noneensures transparent backgrounds-densityaffects SVGs that use physical units; for screen assets, explicit pixel dimensions matter moremogrifyoverwrites existing files with the same name — back up first- ImageMagick's SVG rendering of complex features (filters, masks) may be less precise than browsers
Method 3: Inkscape CLI (High-Quality Batch Export)
Inkscape's command-line mode provides more accurate SVG rendering than ImageMagick.
Basic Batch Script
#!/bin/bash
# Batch SVG to PNG
for f in *.svg; do
  inkscape "$f" --export-filename="${f%.svg}.png" --export-dpi=192
done
Recursive Directory Processing
#!/bin/bash
# Process all SVGs in subdirectories
find ./assets -name "*.svg" | while read f; do
  dir=$(dirname "$f")
  name=$(basename "$f" .svg)
  inkscape "$f" --export-filename="$dir/${name}.png" --export-dpi=192
done
Multi-Size Batch Output
#!/bin/bash
# Generate multiple sizes for each SVG
sizes=(16 24 32 48 64 128 256 512)
for svg in icons/*.svg; do
  name=$(basename "$svg" .svg)
  for size in "${sizes[@]}"; do
    inkscape "$svg" \
      --export-filename="output/${name}-${size}.png" \
      --export-width="$size" \
      --export-height="$size"
  done
done
Inkscape's Advantages
- Best SVG spec compliance: Text, gradients, filters all render accurately
- High output quality: Excellent anti-aliasing
- Cross-platform: Windows, macOS, Linux
Method 4: Node.js Script (Sharp)
For frontend developers, Node.js + Sharp is the most natural batch conversion solution.
Install Dependencies
npm init -y
npm install sharp glob
Basic Batch Script
const sharp = require('sharp');
const glob = require('glob');
const path = require('path');

async function batchConvert(inputDir, outputDir, options = {}) {
  const {
    width = 512,
    height = 512,
    density = 300,
  } = options;

  const files = glob.sync(`${inputDir}/*.svg`);
  console.log(`Found ${files.length} SVG files`);

  for (const file of files) {
    const name = path.basename(file, '.svg');
    const outputPath = path.join(outputDir, `${name}.png`);

    try {
      await sharp(file, { density })
        .resize(width, height, { fit: 'contain', background: { r: 0, g: 0, b: 0, alpha: 0 } })
        .png()
        .toFile(outputPath);
      console.log(`✅ ${name}.png`);
    } catch (err) {
      console.error(`❌ ${name}: ${err.message}`);
    }
  }
}

// Usage
batchConvert('./svg-input', './png-output', { width: 256, height: 256 });
Multi-Size Batch Output
async function multiSizeConvert(inputDir, outputDir) {
  const sizes = [16, 24, 32, 48, 64, 128, 256, 512];
  const files = glob.sync(`${inputDir}/*.svg`);

  for (const file of files) {
    const name = path.basename(file, '.svg');
    for (const size of sizes) {
      const outputPath = path.join(outputDir, `${name}-${size}x${size}.png`);
      await sharp(file, { density: 300 })
        .resize(size, size, { fit: 'contain', background: { r: 0, g: 0, b: 0, alpha: 0 } })
        .png()
        .toFile(outputPath);
    }
    console.log(`✅ ${name}: ${sizes.length} sizes`);
  }
}
Sharp Advantages
- Fast: Based on libvips, 4-5× faster than ImageMagick
- Memory efficient: Stream-based processing, suitable for large batches
- Node.js ecosystem: Integrates with build tools (Webpack, Vite, Gulp)
Method 5: Python Script (cairosvg)
Python developers can use cairosvg for batch conversion.
Install Dependencies
pip install cairosvg pillow⚠️ cairosvg requires the Cairo graphics library. Install with
brew install cairoon macOS orsudo apt install libcairo2-devon Ubuntu.
Basic Batch Script
import cairosvg
import os
from pathlib import Path

def batch_convert(input_dir, output_dir, width=512, height=512):
    """Batch convert SVG to PNG"""
    input_path = Path(input_dir)
    output_path = Path(output_dir)
    output_path.mkdir(parents=True, exist_ok=True)

    svg_files = list(input_path.glob('*.svg'))
    print(f'Found {len(svg_files)} SVG files')

    for svg_file in svg_files:
        output_file = output_path / f'{svg_file.stem}.png'
        try:
            cairosvg.svg2png(
                url=str(svg_file),
                write_to=str(output_file),
                output_width=width,
                output_height=height
            )
            print(f'✅ {svg_file.stem}.png')
        except Exception as e:
            print(f'❌ {svg_file.stem}: {e}')

# Usage
batch_convert('./svg-input', './png-output', width=256, height=256)
Batch Conversion with Progress Bar
from tqdm import tqdm

def batch_convert_with_progress(input_dir, output_dir, sizes=[16, 32, 64, 128, 256]):
    input_path = Path(input_dir)
    output_path = Path(output_dir)
    output_path.mkdir(parents=True, exist_ok=True)

    svg_files = list(input_path.glob('*.svg'))

    for svg_file in tqdm(svg_files, desc='Converting'):
        for size in sizes:
            output_file = output_path / f'{svg_file.stem}-{size}x{size}.png'
            cairosvg.svg2png(
                url=str(svg_file),
                write_to=str(output_file),
                output_width=size,
                output_height=size
            )

batch_convert_with_progress('./icons', './output')
Method 6: Adobe Illustrator Batch Action
If you have an Adobe Illustrator subscription, you can automate batch conversion using the Actions panel.
Set Up Batch Action
-
Record the action:
- Open Window → Actions panel
- Click "Create New Action"
- Name it "SVG to PNG"
- Open an SVG file
- Go to File → Export → Export As…
- Select PNG format, set transparent background and resolution
- Save and close the file
- Click "Stop Recording"
-
Batch execute:
- Go to File → Scripts → Image Processor
- Or use "Batch" from the Actions panel menu
- Select source and destination folders
- Choose the recorded action
- Click "OK" to start batch processing
Advantages
- Highest rendering quality, best support for complex SVG effects
- Can add extra steps in the action (color adjustments, cropping)
Limitations
- Requires paid subscription
- Slower processing (GUI-based operations)
- Manual action recording required
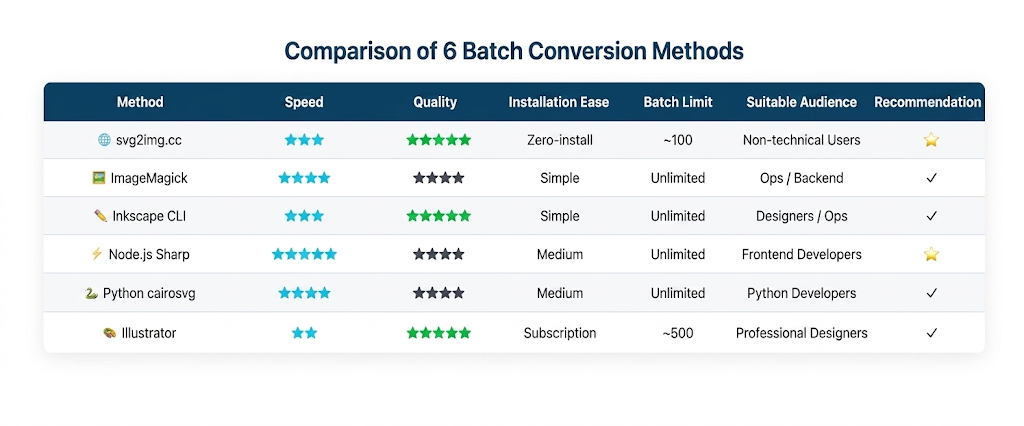
Method Comparison
| Method | Speed | Quality | Setup | Batch Limit | Best For |
|---|---|---|---|---|---|
| svg2img.cc | ⭐⭐⭐ | ⭐⭐⭐⭐⭐ | Zero install | ~100 | Non-technical users |
| ImageMagick | ⭐⭐⭐⭐ | ⭐⭐⭐⭐ | Easy | Unlimited | Ops/Backend |
| Inkscape CLI | ⭐⭐⭐ | ⭐⭐⭐⭐⭐ | Easy | Unlimited | Designers/Ops |
| Node.js (Sharp) | ⭐⭐⭐⭐⭐ | ⭐⭐⭐⭐ | Medium | Unlimited | Frontend devs |
| Python (cairosvg) | ⭐⭐⭐⭐ | ⭐⭐⭐⭐ | Medium | Unlimited | Python devs |
| Illustrator | ⭐⭐ | ⭐⭐⭐⭐⭐ | Subscription | ~500 | Pro designers |
Best Practices for Batch Conversion
1. Consistent Naming Convention
icon-name-16x16.png
icon-name-32x32.png
icon-name-64x64.png
icon-name-128x128.png
icon-name-256x256.png
icon-name-512x512.png
2. Uniform Output Settings
Ensure all outputs use the same pixel dimensions across the batch. If the SVGs use physical units or print sizing, keep density settings consistent too.
3. Preserve Directory Structure
When source files span multiple directories, maintain the same structure in output:
find ./src -name "*.svg" | while read f; do
  relative="${f#./src/}"
  output="./dist/${relative%.svg}.png"
  mkdir -p "$(dirname "$output")"
  inkscape "$f" --export-filename="$output" --export-dpi=192
done
4. Verify Output
After batch conversion, check output file integrity and dimensions:
# Check all output PNG dimensions
for f in output/*.png; do
  identify "$f" | awk '{print $1, $3}'
done

# Find zero-byte files
find output/ -name "*.png" -empty
5. Handle Failures
Add error handling and retry logic to ensure all files are converted:
#!/bin/bash
failed=()
for f in *.svg; do
  if ! inkscape "$f" --export-filename="${f%.svg}.png" --export-dpi=192 2>/dev/null; then
    failed+=("$f")
  fi
done

if [ ${#failed[@]} -gt 0 ]; then
  echo "Failed files:"
  printf '%s\n' "${failed[@]}"
fi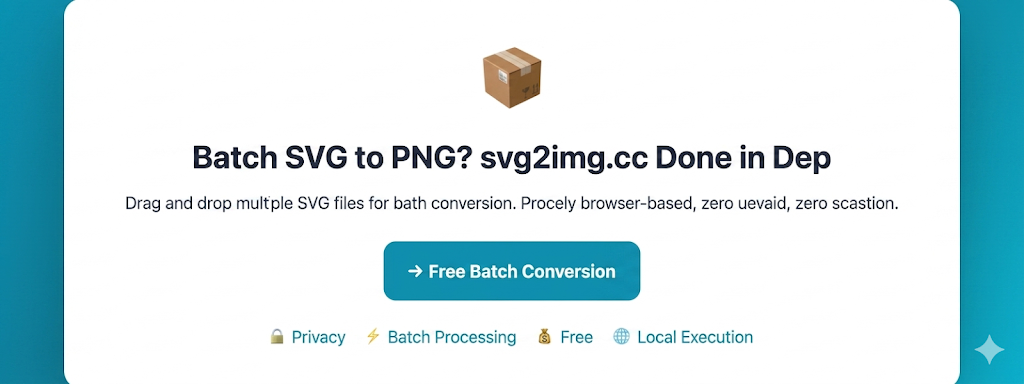
Conclusion
Which method you choose depends on your needs:
- Quick processing of dozens of files: svg2img.cc drag-and-drop
- Large-scale automation: ImageMagick or Inkscape CLI
- Integration into build pipelines: Node.js (Sharp) or Python (cairosvg)
- Highest rendering quality: Adobe Illustrator or Inkscape
Whichever method you choose, standardize your output settings (dimensions, DPI, transparent background) and verify output file integrity after batch processing.
FAQ
Q: Some SVGs render incorrectly during batch conversion. What should I do?
A: Different rendering engines support the SVG spec to varying degrees. If ImageMagick has rendering issues, try Inkscape CLI instead — it has the most complete SVG support. Or test individual files with svg2img.cc to determine if the issue is the rendering engine or the SVG file itself.
Q: How do I batch convert while preserving SVG's original dimensions?
A: Don't specify resize parameters. In ImageMagick, omit -resize. In Inkscape, use --export-area-drawing. In Sharp, don't call .resize().
Q: What's the fastest method for converting 10,000+ SVGs?
A: Node.js + Sharp is the fastest option. Add concurrency (e.g., process 10 files simultaneously) for even more speed. Watch your memory usage — control the concurrency level to avoid OOM errors.
Q: How do I automate SVG batch conversion in a CI/CD pipeline?
A: Add a conversion script to your build step. Sharp (Node.js) or cairosvg (Python) are recommended — easy to install and suitable for headless environments. Make sure the CI image has necessary system dependencies (like Cairo).
Q: Output file sizes are too large. How can I optimize?
A: Post-process PNGs with pngquant or optipng:
# Lossless optimization
optipng -o5 output/*.png

# Lossy optimization (60-80% size reduction)
pngquant --quality=65-80 --output output/ --force output/*.png
Put the guide into practice
Convert SVG files locally in your browser without uploading them.
Open converter