How to Convert SVG to PNG with Transparent Background (6 Methods)
SVG files natively support transparent backgrounds — it's one of the format's built-in advantages. But when you convert SVG to PNG, that transparency doesn't always survive the journey. White backgrounds, gray checkerboards where there should be nothing, jagged edges with white halos… these issues are frustratingly common.
This guide walks you through 6 proven methods that reliably preserve transparent backgrounds during SVG-to-PNG conversion, along with fixes for common issues like white fringing, anti-aliasing halos, and lost semi-transparency.
> Why Does SVG Transparency Get Lost in Conversion?
Before jumping into solutions, let's understand the problem.
How SVG Handles Transparency
SVG achieves transparency through three mechanisms:
- No background element — SVG is transparent by default unless you explicitly add a
<rect>or background shape opacityandfill-opacityattributes — control element and fill transparencyrgba()color values — enable semi-transparent fills and strokes
How PNG Handles Transparency
PNG uses an Alpha channel — each pixel stores a transparency value from 0 (fully transparent) to 255 (fully opaque). PNG-8 supports 1-bit transparency (on or off only), while PNG-24/32 supports full 8-bit alpha (256 levels of semi-transparency).
Three Main Causes of Lost Transparency
| Cause | Symptom | Fix Direction |
|---|---|---|
| Tool adds default white background | Entire image appears on white | Use a tool that supports transparent export |
| SVG has hidden background rectangle | Looks transparent but has white layer | Check and remove background elements in SVG |
| Anti-aliasing creates fringe/halo | White/gray thin lines on edges | Use correct matte settings or pre-process |
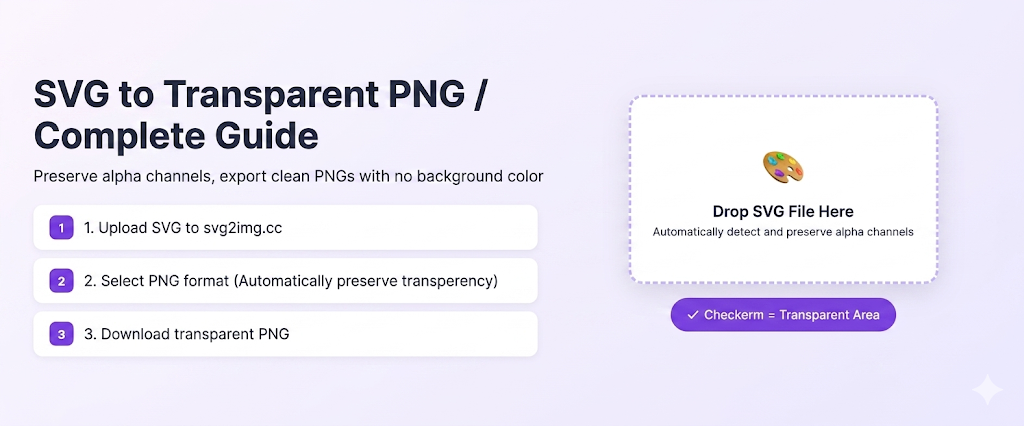
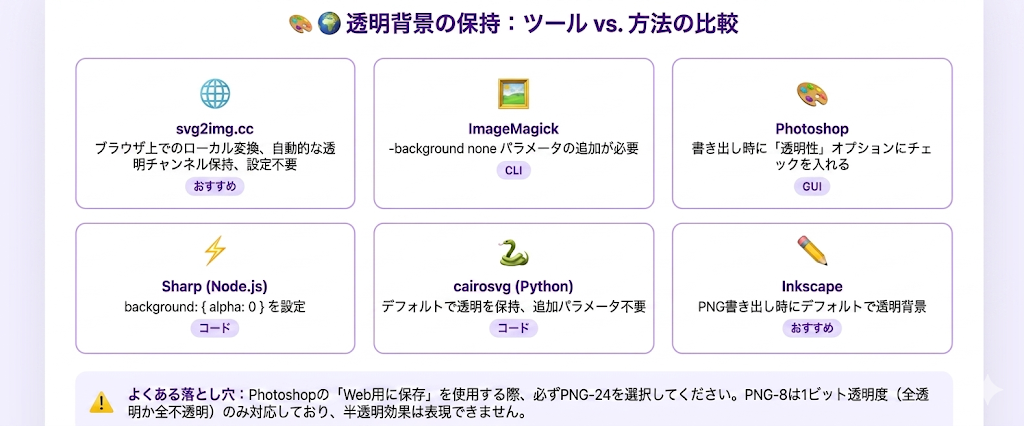
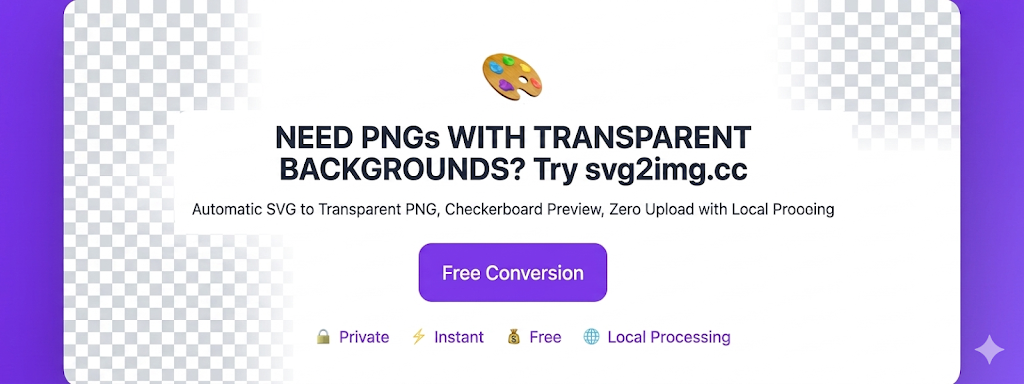
> Method 1: svg2img.cc (Recommended)
svg2img.cc is a free online tool that runs entirely in your browser — your files are never uploaded to any server. It preserves SVG transparency by default, making it the fastest option for most users.
Steps
- Open svg2img.cc
- Drag and drop your SVG file onto the page, or click to browse
- Confirm the output format is set to PNG
- Adjust dimensions if needed — keeping the original size preserves the most quality
- Click convert and download the result
Why We Recommend It
- Privacy-first: All processing happens locally in your browser — files never leave your device
- Zero transparency loss: Uses the Canvas API for rendering, preserving the full Alpha channel
- Batch support: Drag in multiple SVG files at once
- No registration: Open and use, no limits or accounts required
💡 Pro tip: Many design tools add hidden white background rectangles when exporting SVG. Before converting, open the SVG in a text editor, search for
<rect, and check if there's a full-canvas background rectangle. Delete it for the cleanest results.
> Method 2: Adobe Illustrator
Adobe Illustrator is the professional designer's go-to tool, offering precise control over transparency and export settings.
Steps
- Open the SVG file in Illustrator
- Check for unwanted background rectangles — open the Layers panel (F7) and inspect each layer
- Go to File → Export → Export As…
- Select PNG as the format
- In the export options:
- Background Color: Select Transparent
- Anti-aliasing: Choose "Optimize for Text" or "Optimize for Art"
- Resolution: 72ppi for screen, 300ppi for print
- Click OK to export
Important Notes
- If the exported PNG still has a white background, check the artboard settings — make sure the artboard itself doesn't have a white background
- Use the Asset Export panel to batch-export multiple SVG elements
- Illustrator handles complex SVG blend modes and transparency effects the best
> Method 3: Inkscape (Free & Open Source)
Inkscape is the most powerful free SVG editor with native SVG support and rock-solid transparency handling.
GUI Method
- Open the SVG file in Inkscape
- Go to File → Export PNG Image (Ctrl+Shift+E)
- In the export panel:
- Select the export area (Page, Drawing, Selection, or Custom)
- Set DPI (default is 96; use 192 or 288 for high-DPI output)
- Confirm Background is not checked (transparent by default)
- Click Export
Command Line Method
Inkscape supports command-line batch export:
# Single file export
inkscape input.svg --export-filename=output.png --export-dpi=192

# Batch export all SVGs in current directory
for f in *.svg; do
  inkscape "$f" --export-filename="${f%.svg}.png" --export-dpi=192
done
Advantages
- Completely free and open source, cross-platform (Windows/macOS/Linux)
- Best SVG spec compliance among free tools
- Command-line mode perfect for batch processing
- Exported PNGs are transparent by default with excellent quality
> Method 4: ImageMagick Command Line
ImageMagick is a powerful command-line image processing tool, ideal for developers and automation pipelines.
Basic Conversion
# Simplest transparent conversion
convert -background none input.svg output.png

# Specify output dimensions
convert -background none -size 1024x1024 input.svg output.png

# Specify DPI
convert -background none -density 300 input.svg output.png
The -background none Flag Is Critical
The -background none flag tells ImageMagick not to add any background color, preserving transparency. Omitting this flag results in a default white background.
Batch Processing
# Batch convert all SVGs in directory
mogrify -background none -format png *.svg

# Recursive processing with find
find . -name "*.svg" -exec convert -background none {} {}.png \;
Common Issues & Fixes
| Issue | Solution |
|---|---|
| Wrong output dimensions | Set explicit -resize, -w/-h, or export width/height values |
| Jagged edges | Add -resize 200% to render larger then scale down |
| Color shift | Try -colorspace sRGB |
| Missing elements | Upgrade ImageMagick to the latest version |
> Method 5: Programming Approaches
If you need to integrate SVG-to-PNG conversion into an application, here are the main programming options.
Node.js + Sharp
const sharp = require('sharp');

async function svgToPngTransparent(inputPath, outputPath) {
  await sharp(inputPath)
    .png()
    .toFile(outputPath);
}

// Sharp preserves SVG transparency by default
svgToPngTransparent('logo.svg', 'logo.png');
Node.js + Puppeteer
const puppeteer = require('puppeteer');

async function svgToPng(svgPath, outputPath, width = 1024) {
  const browser = await puppeteer.launch();
  const page = await browser.newPage();
  await page.setViewport({ width, height: width });
  await page.goto(`file://${svgPath}`);
  await page.screenshot({
    path: outputPath,
    type: 'png',
    omitBackground: true  // Critical: preserve transparent background
  });
  await browser.close();
}
Python + cairosvg
import cairosvg

# Basic conversion (transparent by default)
cairosvg.svg2png(
    url='input.svg',
    write_to='output.png',
    output_width=1024,
    output_height=1024
)
Python + Wand (ImageMagick binding)
from wand.image import Image

with Image(filename='input.svg', background=None) as img:
    img.format = 'png'
    img.resize(1024, 1024)
    img.save(filename='output.png')
Performance Comparison
| Approach | Speed | Quality | Setup | Best For |
|---|---|---|---|---|
| Sharp | ⭐⭐⭐⭐⭐ | ⭐⭐⭐⭐ | Easy | Node.js server-side |
| Puppeteer | ⭐⭐ | ⭐⭐⭐⭐⭐ | Medium | Precise CSS rendering needed |
| cairosvg | ⭐⭐⭐⭐ | ⭐⭐⭐⭐ | Medium | Python server-side |
| Wand | ⭐⭐⭐ | ⭐⭐⭐⭐ | Needs IM | Existing ImageMagick setup |
> Method 6: GIMP
GIMP is another powerful free image editor. While not an SVG-native editor, it handles transparent PNG export well.
Steps
- Open the SVG file in GIMP (a rasterization dialog will appear)
- Set an appropriate resolution (300ppi recommended) and dimensions
- Check the layers panel — ensure there's no white background layer
- If a white background layer exists, right-click and delete it
- Go to File → Export As…
- Select PNG format
- In the export options:
- Check Save background color (preserves transparency)
- Set PNG compression level (6 is a good balance)
- Click Export
GIMP Notes
- GIMP rasterizes SVGs on import, so the initial resolution setting is critical
- If you set resolution too low, you can't improve quality later
- Consider setting the initial size to 2× your target, then scaling down
> How to Verify Transparency Was Preserved
After conversion, verify that your PNG actually has a transparent background.
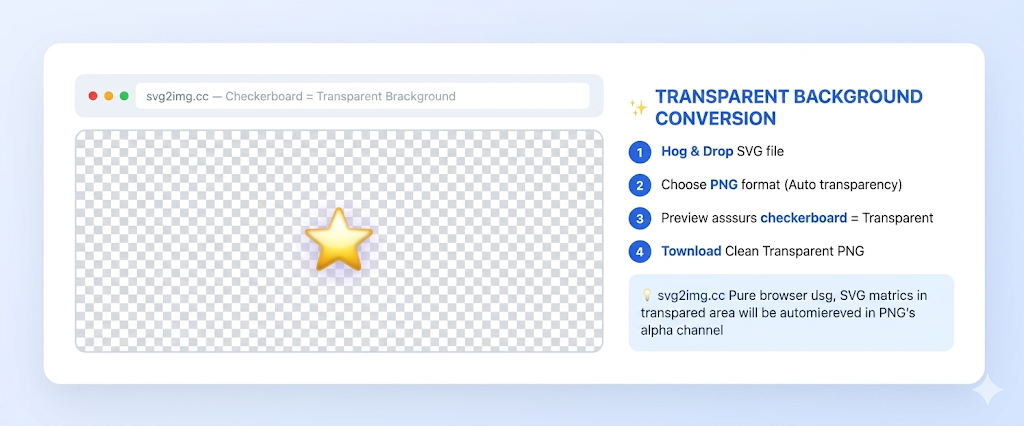
1. The Checkerboard Test
Open the PNG in any professional image viewer or editor. If the background shows a checkerboard pattern (alternating gray and white squares), transparency is preserved correctly.
2. Web Page Test
<div style="background: repeating-conic-gradient(#ccc 0% 25%, #fff 0% 50%) 50% / 20px 20px;">
  <img src="your-image.png" alt="test">
</div>
3. Command Line Verification
# Check if the image has an Alpha channel
identify -verbose output.png | grep "Alpha"

# Output "alpha: 1" means transparency is present
4. Quick Online Check
Drag the converted PNG onto svg2img.cc — the browser's native image preview will show a checkerboard background, letting you visually confirm transparency.
> Common Issues & Solutions
White Fringing / Halo Effect
This is the most common transparency issue. When SVG graphics have anti-aliased edges, some pixels blend with the background color. If the SVG was designed on a white background, edge pixels mix with white, creating a visible halo on dark backgrounds.
Solutions:
- Redesign the SVG on a dark background, or specify the matte color as your target background
- When using svg2img.cc, ensure the SVG file itself has no white background elements
- Use "Defringe" or "Remove White Matte" in Photoshop/GIMP
Lost Semi-Transparency
If your SVG uses opacity or rgba() for semi-transparent effects, some tools may flatten them.
Solutions:
- Use professional tools like Inkscape or Illustrator
- Check if
<style>tags withopacitysettings are being ignored by the converter
Gradient Transparency Issues
SVG linear and radial gradients can include transparency changes (stop-opacity), which some converters may not handle properly.
Solutions:
- Verify SVG gradient definitions use standard syntax
- Use tools with full SVG spec support (Inkscape, Illustrator)
Shadow and Blur Effects
SVG <filter> elements (feGaussianBlur, feDropShadow) may render differently when converted to PNG.
Solutions:
- Increase export resolution to reduce blur artifacts
- Use rendering engines with SVG Filter support (Puppeteer, Inkscape)
> Method Comparison Summary
| Method | Price | Transparency Quality | Ease of Use | Batch | Privacy |
|---|---|---|---|---|---|
| svg2img.cc | Free | ⭐⭐⭐⭐⭐ | ⭐⭐⭐⭐⭐ | ✅ | Browser-local |
| Illustrator | Paid | ⭐⭐⭐⭐⭐ | ⭐⭐⭐⭐ | ✅ | Local |
| Inkscape | Free | ⭐⭐⭐⭐⭐ | ⭐⭐⭐ | ✅ CLI | Local |
| ImageMagick | Free | ⭐⭐⭐⭐ | ⭐⭐ | ✅ | Local |
| Programming | Free | ⭐⭐⭐⭐ | ⭐⭐ | ✅ | Local |
| GIMP | Free | ⭐⭐⭐⭐ | ⭐⭐⭐ | ❌ | Local |
> Conclusion
The key to converting SVG to PNG with a transparent background is choosing the right tool. For most users, svg2img.cc is the simplest choice — open your browser, drag in your file, and get a perfectly transparent PNG with all processing done locally for privacy.
Professional designers will find more control in Illustrator and Inkscape. Developers can automate batch processing with ImageMagick or programming solutions.
Whichever method you choose, always verify the result with a checkerboard test to confirm transparency was preserved correctly.
> FAQ
Q: Do all PNGs support transparent backgrounds?
A: PNG-8 (indexed color) only supports fully transparent or fully opaque pixels (1-bit alpha), suitable for simple icons. PNG-24/32 supports 256 levels of semi-transparency via an 8-bit alpha channel. Most modern tools default to PNG-32 output.
Q: Why does the same SVG produce different results with different tools?
A: Different rendering engines support the SVG specification to varying degrees. Chrome's rendering engine (Blink) has the most complete support, so browser-based tools like svg2img.cc typically produce the best results. ImageMagick uses its own SVG parser, which may not support some complex features.
Q: SVG text looks blurry after PNG conversion — what should I do?
A: Increase the exported pixel dimensions. Text is vector-based, so rendering to a larger PNG gives the rasterizer more pixels to draw the glyphs. For screen display, export at least 2x the final display size when sharpness matters. For print, calculate pixel dimensions from the target physical size and DPI.
Q: How do I fix white edge lines on transparent PNGs?
A: This is anti-aliasing fringe. Use "Remove White Matte" or "Defringe" in your image editor. Alternatively, design your SVG on a dark background matching your intended use.
Q: What's the maximum SVG size svg2img.cc can handle?
A: Since svg2img.cc runs entirely in your browser, the maximum output size depends on your device. Typically, 4096×4096 pixels works fine; larger sizes may need to be processed in tiles.
Q: How can I ensure batch conversions all maintain transparency?
A: Use tools that support batch processing and default to transparent output. svg2img.cc supports batch drag-and-drop with transparent defaults. CLI tools like Inkscape's command line or ImageMagick's mogrify are also great for batch workflows.